This tutorial demonstrates how to Add content and share resources.
1. This video demonstrates how to Add content and share resources.
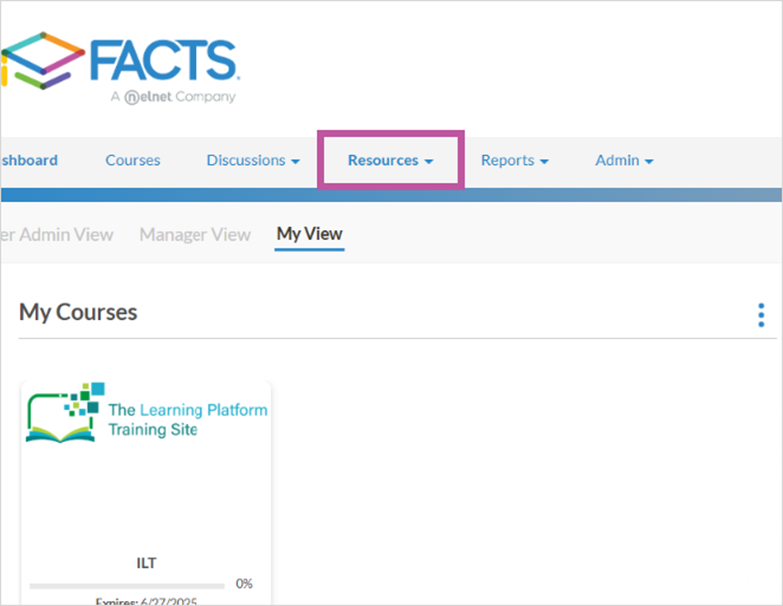
The first step is to open your LMS Site and click Resources

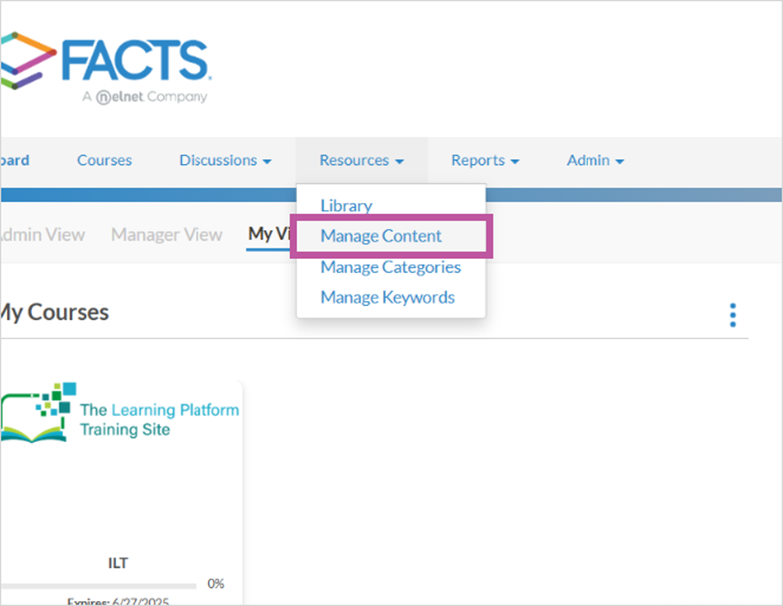
2. Click Manage Content

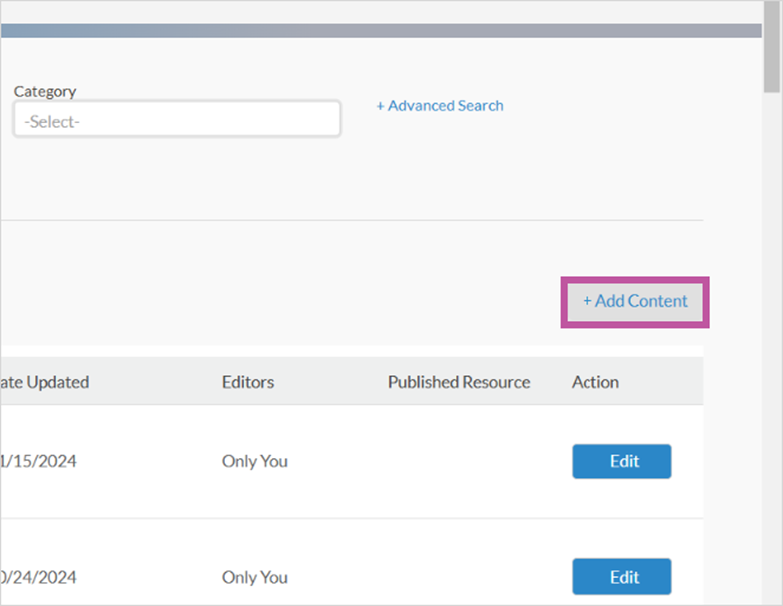
3. Click + Add Content

4. Click Content Type Dropdown

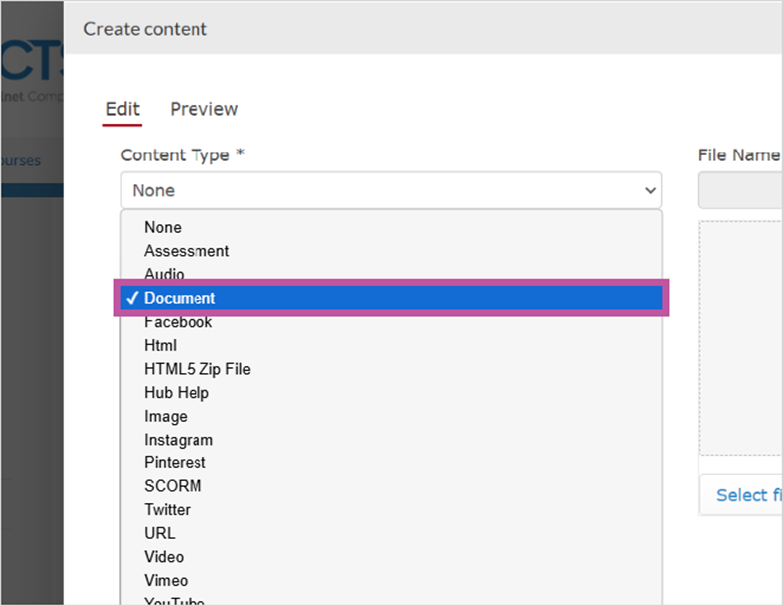
5. Select Content type

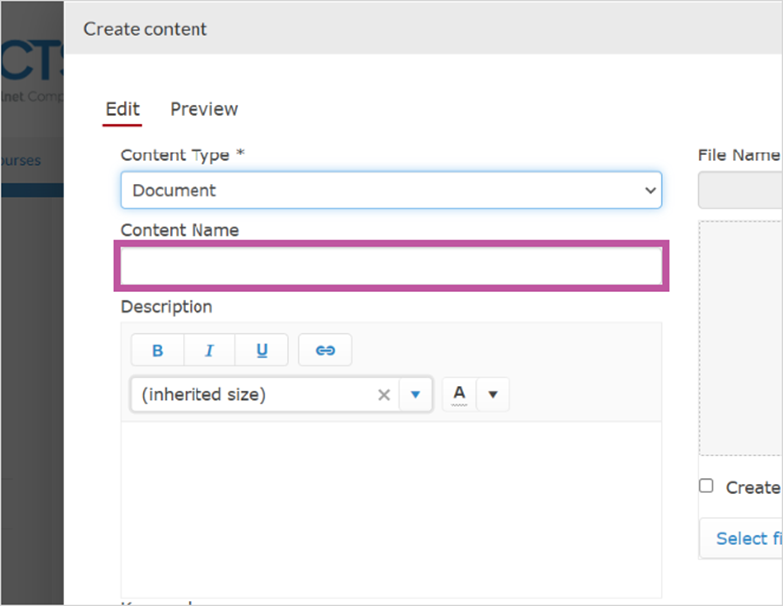
6. Click Content Name

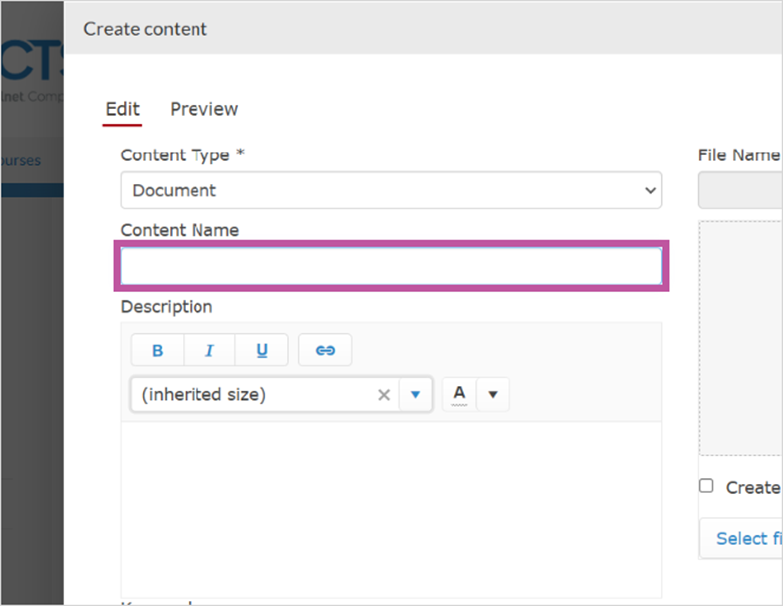
7. Type Content Name

8. To Add a content description, click Description field box

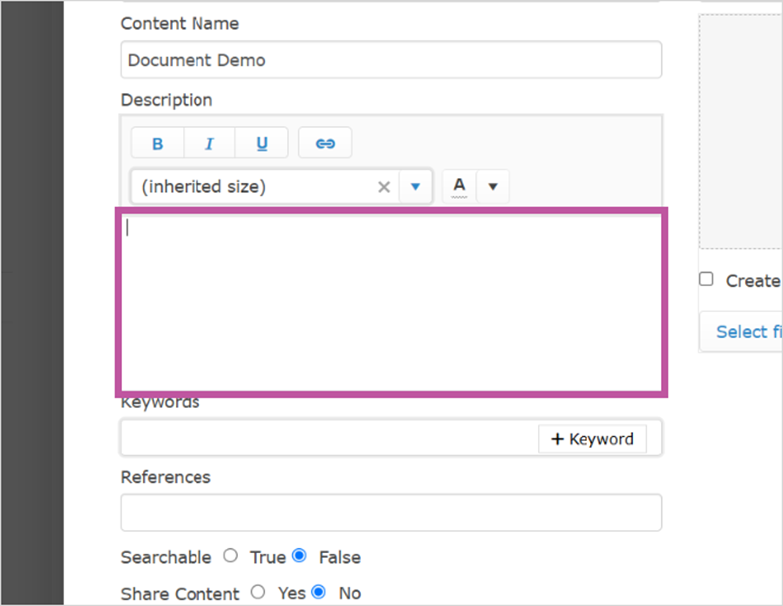
9. Type Description in field box

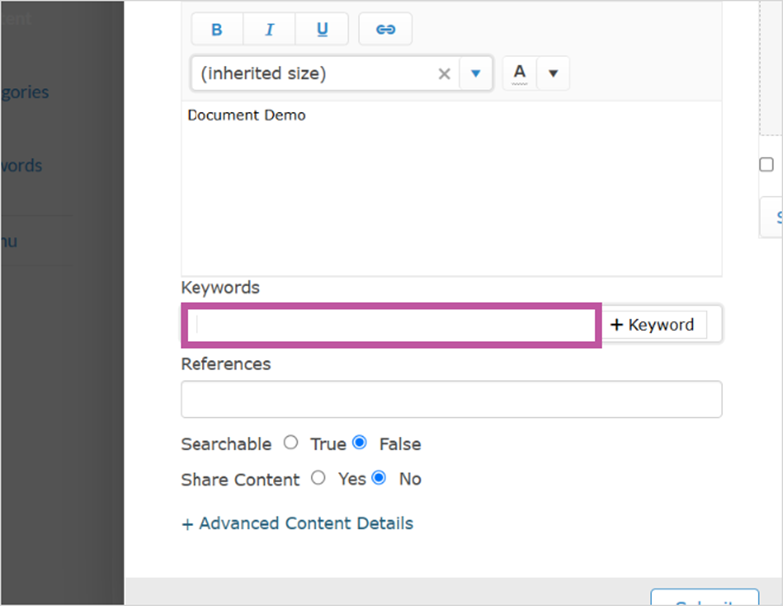
10. To add a keyword for searching purposes, scroll down and click Keywords

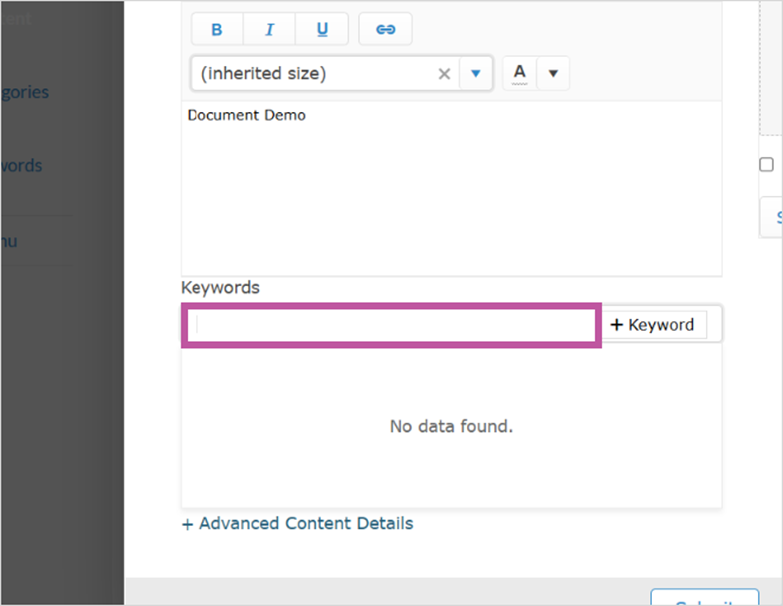
11. Type Keywords

12. To add References, click References

13. Type References

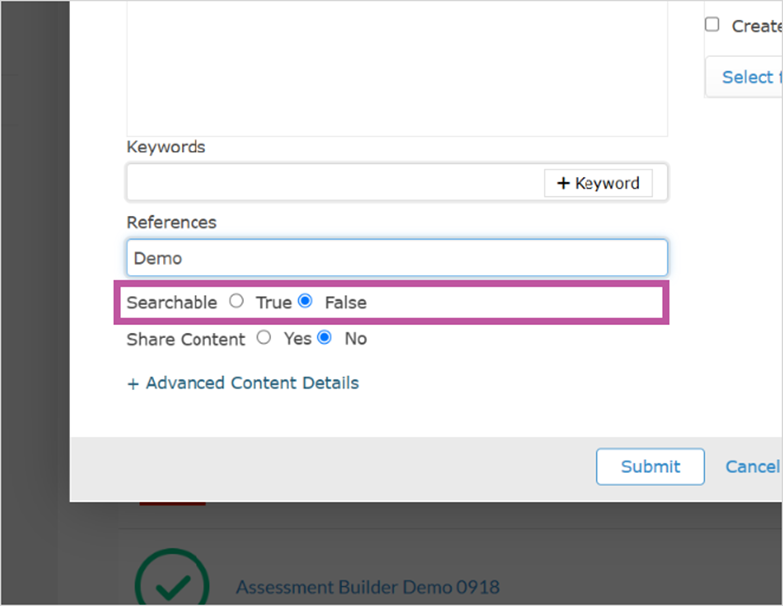
14. Click Searchable False
Note: To make searchable to others in the library click Searchable True

15. Click Share Content No

16. To share a file with other users without posting it to the Library, change the selection in the Share Content field from No to Yes

17. To Share with a Group, Scroll down and click Group

18. Select and Click Group

19. To add a Category scroll down and click +Category
Note: Category creates a folder for related content

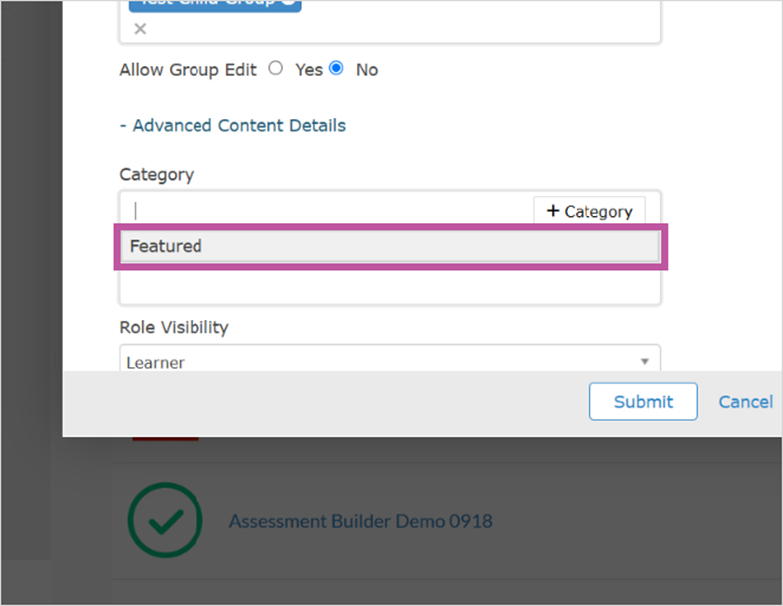
20. Select or type new Category

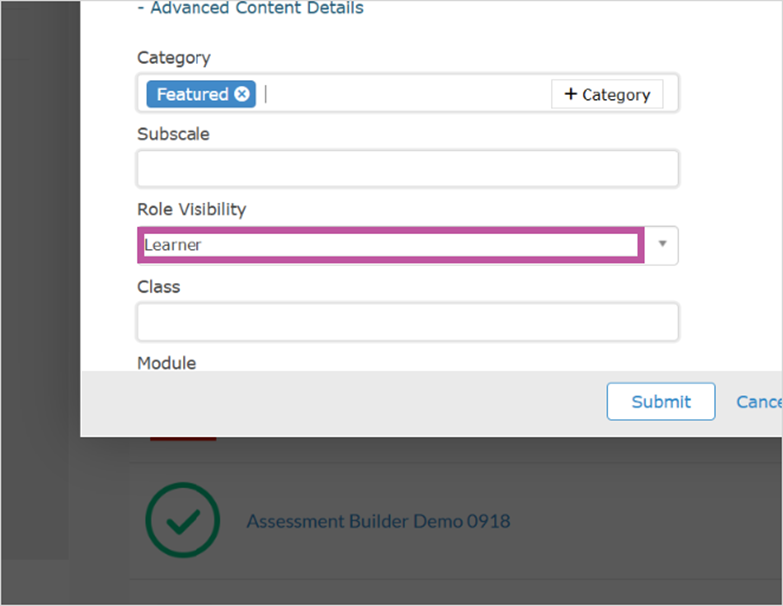
21. To add role visibility, scroll down and click Role

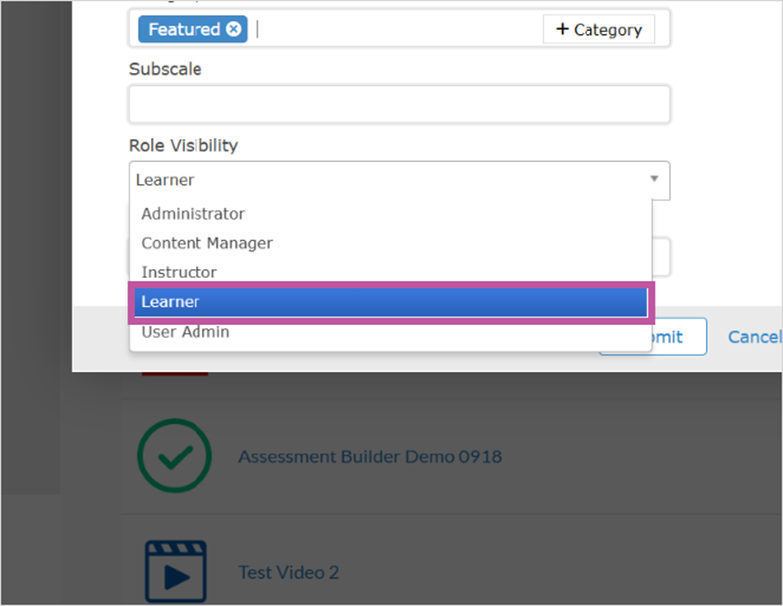
22. Click Role

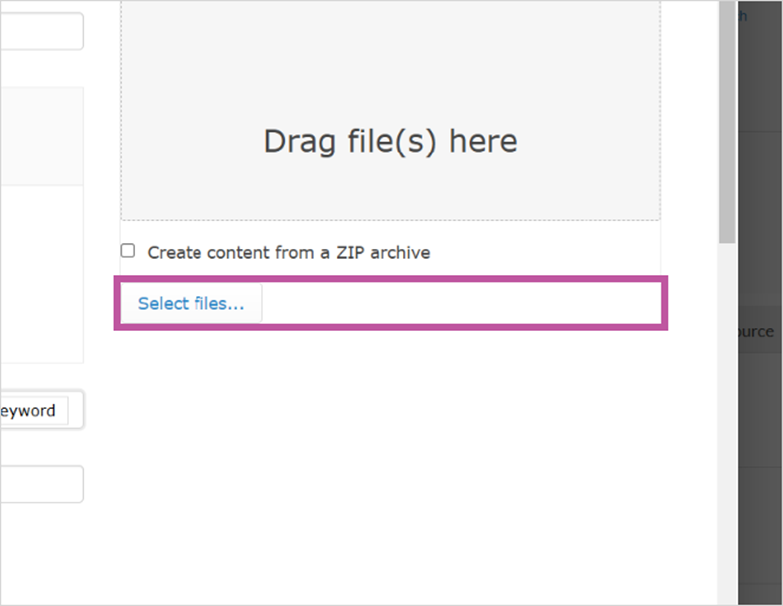
23. To add file/content, scroll up and click Select file(s)

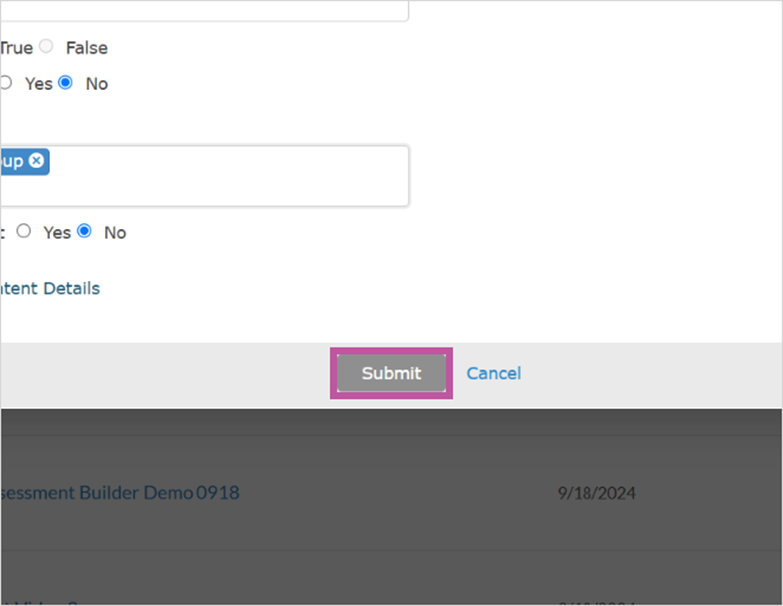
24. Once your content is added, scroll down and click Submit

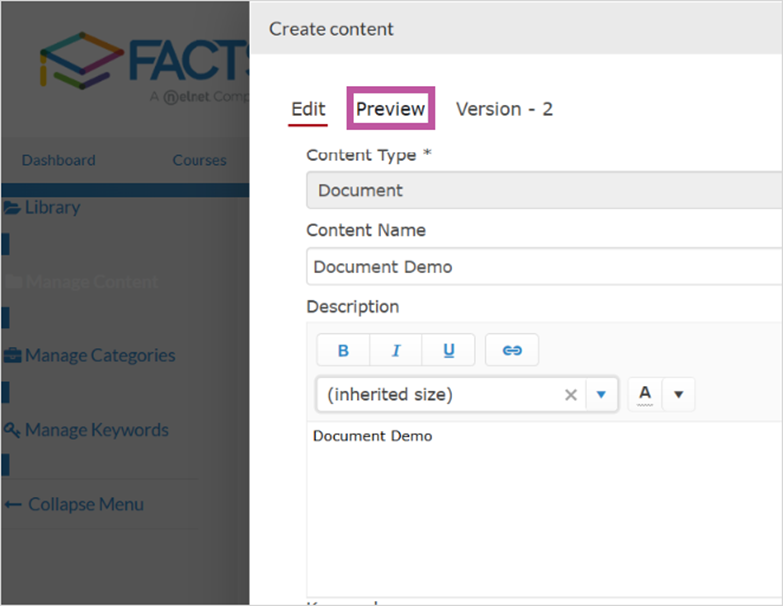
25. To Preview your content, scroll up and click Preview

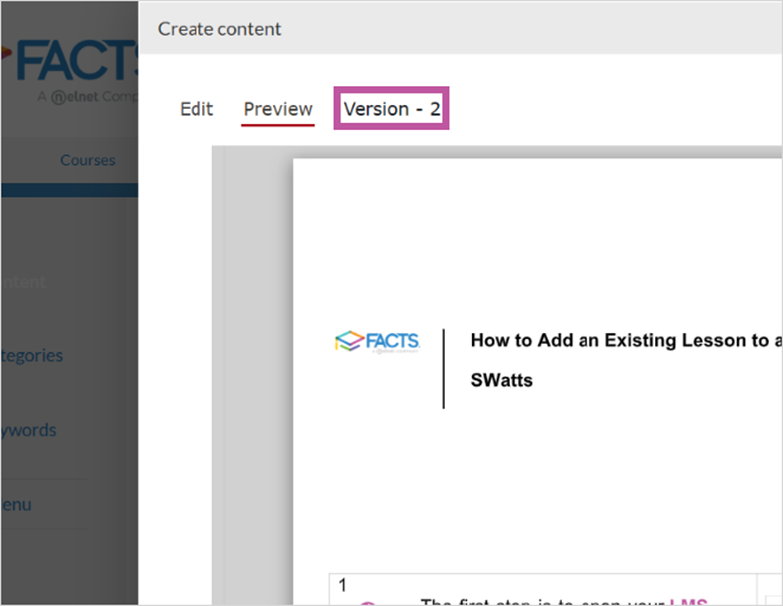
26. To see versions scroll up and Click Version

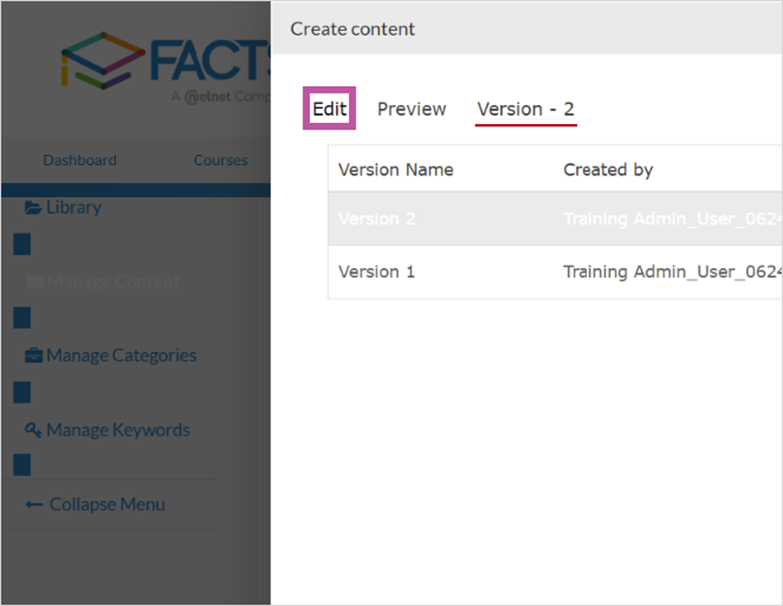
27. To Edit your content, Click Edit

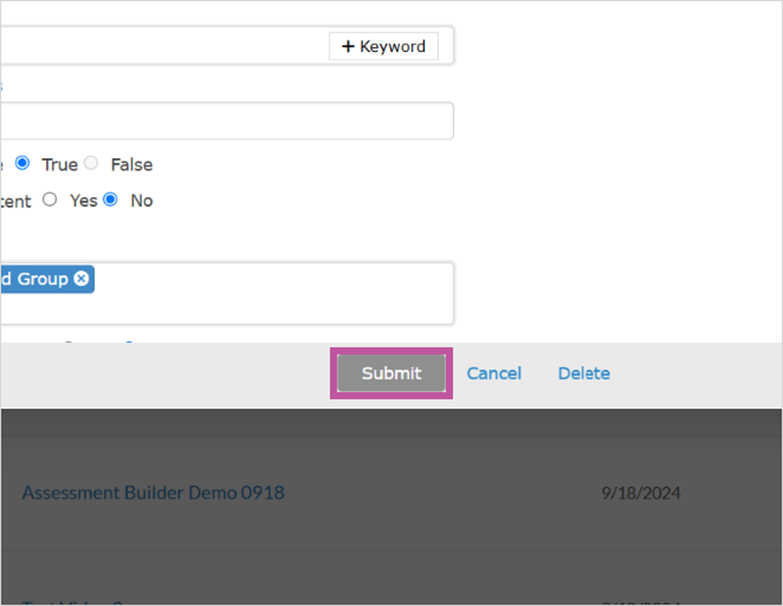
28. When finished adding/editing your content, click Submit

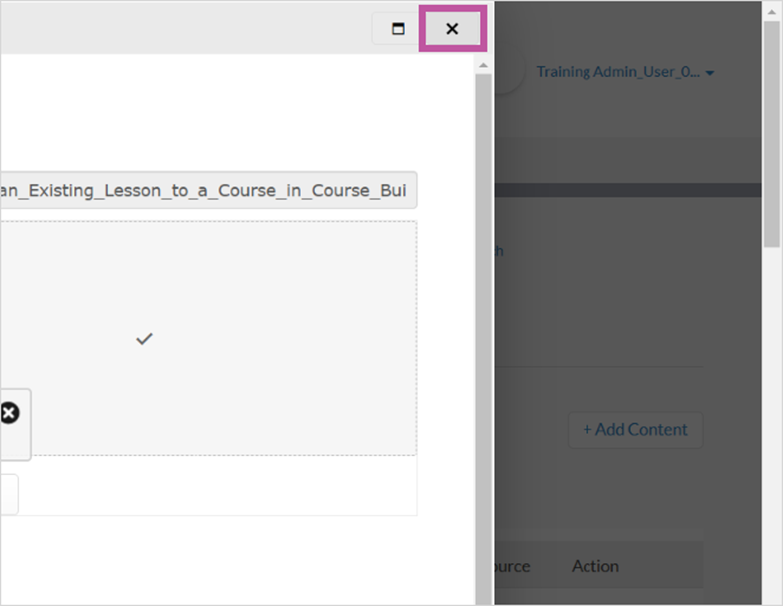
29. Scroll up and click Close

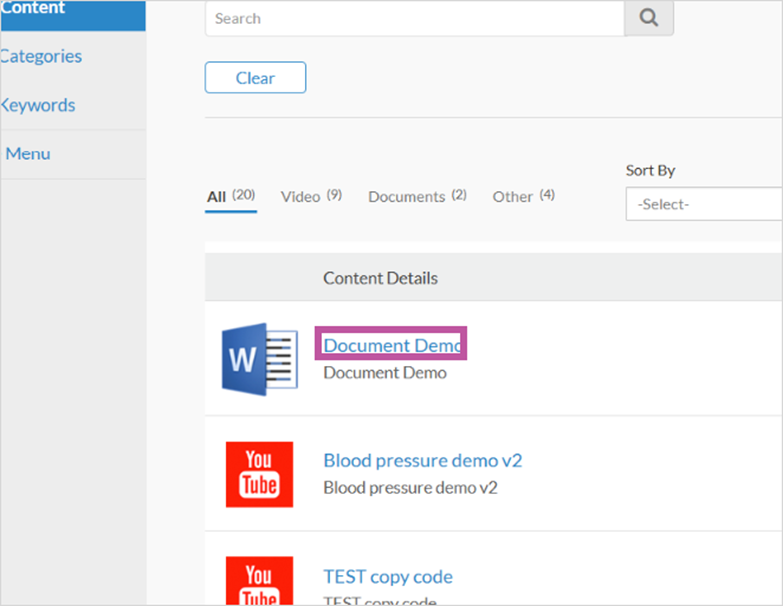
30. You will now see your content in the Resource Library and you can now add your content to courses in Course Builder.

31. That's it. You're done.

Here's an interactive tutorial
** Best experienced in Full Screen (click the icon in the top right corner before you begin) **
https://www.iorad.com/player/2481466/How-to-Add-Content-and-Share-Resources?iframeHash=trysteps-1
1. This video demonstrates how to Add content and share resources.
The first step is to open your LMS Site and click Resources
2. Click Manage Content
3. Click + Add Content
4. Click Content Type Dropdown
5. Select Content type
6. Click Content Name
7. Type Content Name
8. To Add a content description, click Description field box
9. Type Description in field box
10. To add a keyword for searching purposes, scroll down and click Keywords
11. Type Keywords
12. To add References, click References
13. Type References
14. Click Searchable False
Note: To make searchable to others in the library click Searchable True
15. Click Share Content No
16. To share a file with other users without posting it to the Library, change the selection in the Share Content field from No to Yes
17. To Share with a Group, Scroll down and click Group
18. Select and Click Group
19. To add a Category scroll down and click +Category
Note: Category creates a folder for related content
20. Select or type new Category
21. To add role visibility, scroll down and click Role
22. Click Role
23. To add file/content, scroll up and click Select file(s)
24. Once your content is added, scroll down and click Submit
25. To Preview your content, scroll up and click Preview
26. To see versions scroll up and Click Version
27. To Edit your content, Click Edit
28. When finished adding/editing your content, click Submit
29. Scroll up and click Close
30. You will now see your content in the Resource Library and you can now add your content to courses in Course Builder.
31. That's it. You're done.
Here's an interactive tutorial
** Best experienced in Full Screen (click the icon in the top right corner before you begin) **
https://www.iorad.com/player/2481466/How-to-Add-Content-and-Share-Resources?iframeHash=trysteps-1
Click on the highlighted boxes or use the arrows to navigate.
Written Guide:
Step 1: Open your LMS Site and click Resources
Step 2: Click Manage Content
Step 3: Click + Add Content
Step 4: Click Content Type Dropdown
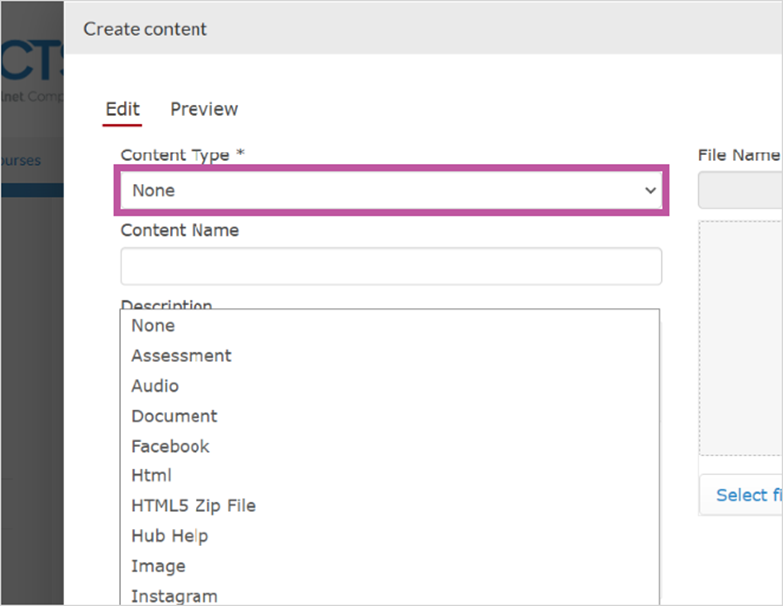
Step 5: Select Content type
Step 6: Click Content Name
Step 7: Type Content Name
Step 8: To Add a content description, click Description field box
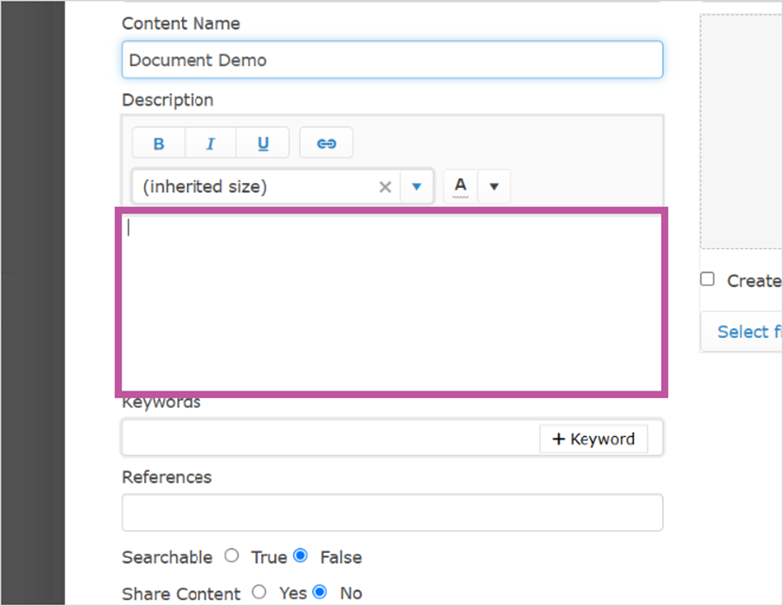
Step 9: Type Description in field box
Step 10: To add a keyword for searching purposes, scroll down and click Keywords
Step 11: Type Keywords
Step 12: To add References, click References
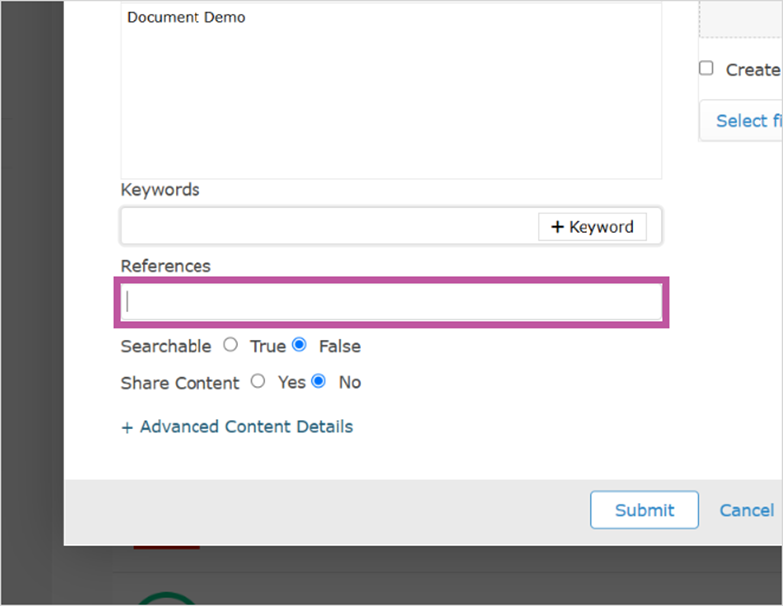
Step 13: Type References
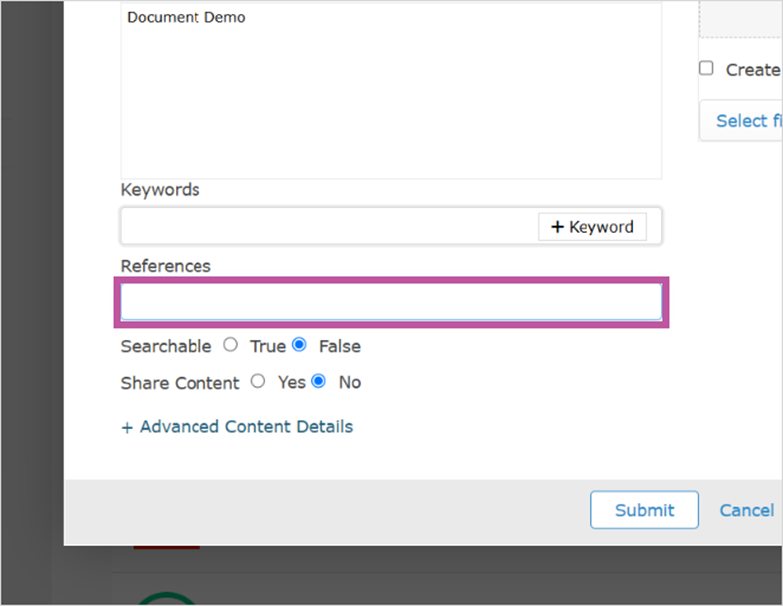
Step 14: Click Searchable False Note: To make searchable to others in the library click Searchable True.
Step 15: Click Share Content No
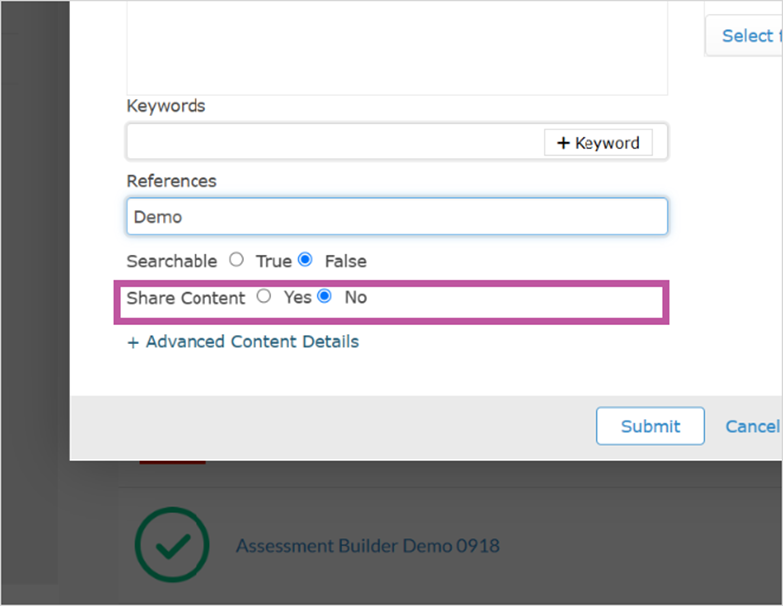
Step 16: To share a file with other users without posting it to the Library, change the selection in the Share Content field from No to Yes
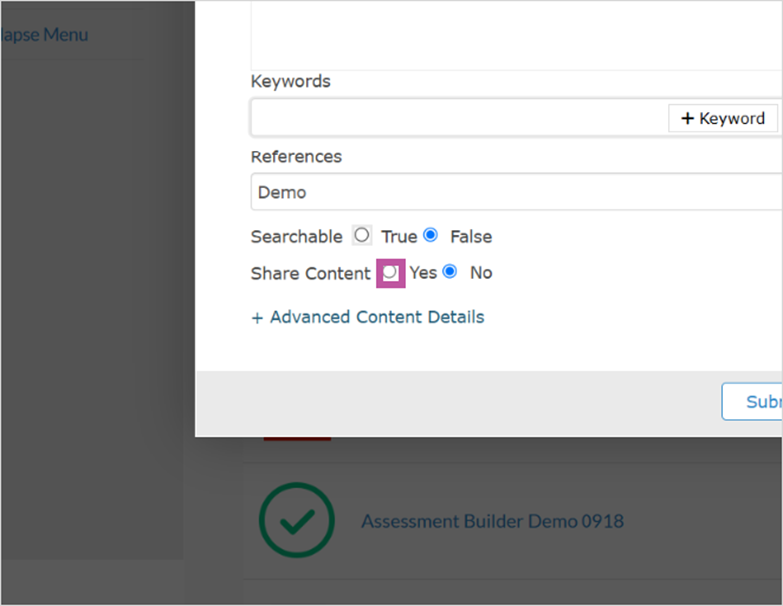
Step 17: To Share with a Group, Scroll down and click Group
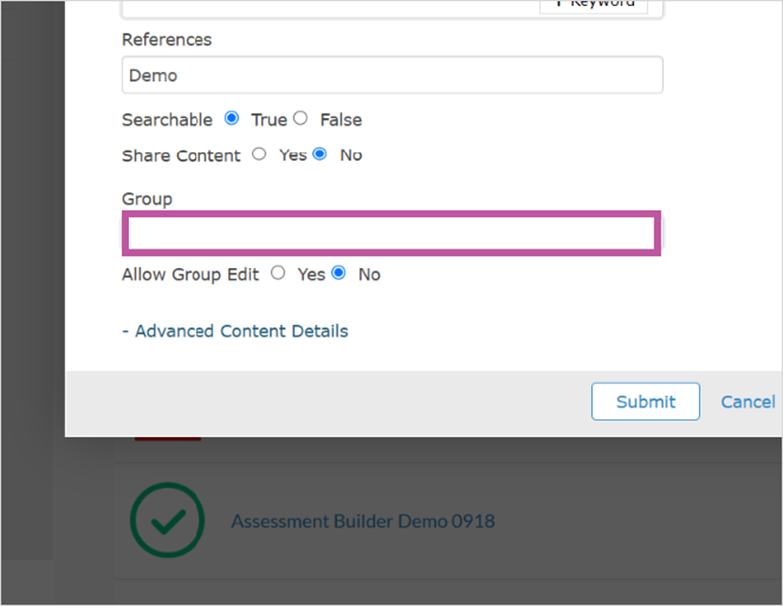
Step 18: Select and Click Group
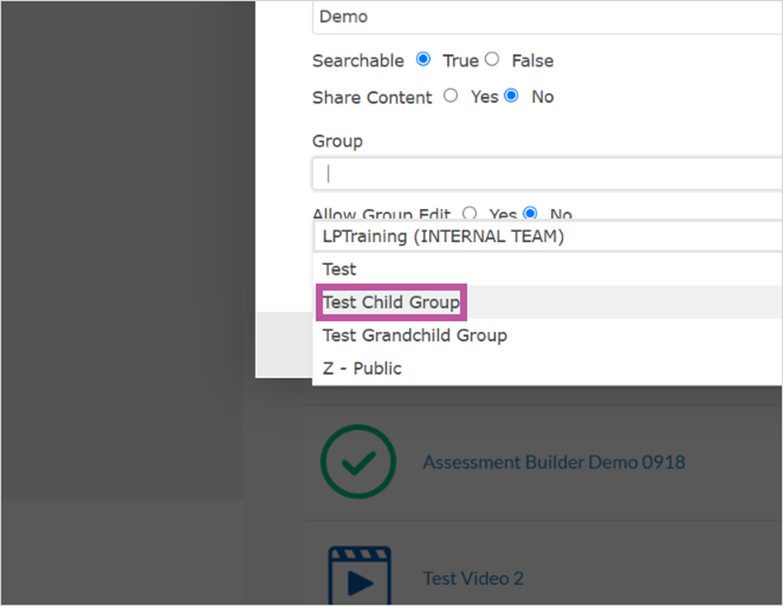
Step 19: To add a Category scroll down and click +Category Note: Category creates a folder for related content.
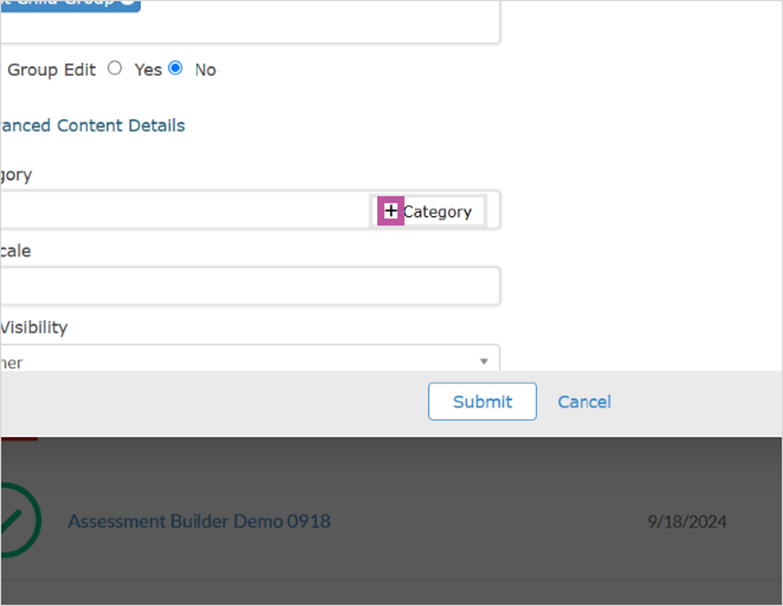
Step 20: Select or type new Category
Step 21: To add role visibility, scroll down and click Role
Step 22: Click Role
Step 23: To add file/content, scroll up and click Select file(s)
Step 24: Once your content is added, scroll down and click Submit
Step 25: To Preview your content, scroll up and click Preview
Step 26: To see versions scroll up and Click Version
Step 27: To Edit your content, Click Edit
Step 28: When finished adding/editing your content, click Submit
Step 29: Scroll up and click Close
Step 30: You will now see your content in the Resource Library and you can now add your content to courses in Course Builder